
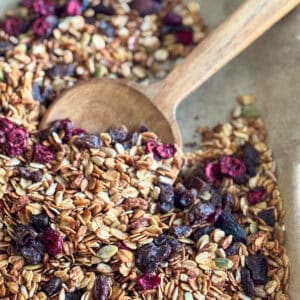
This nut-free granola recipe is easy to make and perfect for those with allergies or dietary restrictions. Crisp, perfectly sweet, and made with a handful of simple ingredients, it's a safe and delicious alternative to store-bought options that often contain nuts or "may contain" warnings.
I developed this recipe after struggling to find affordable nut-free granola at the store. Most commercial brands either contain nuts, are processed on shared equipment, or come with a hefty price tag, not to mention that they often include unnecessary ingredients. Finding options that are gluten-free, nut-free, or lower in sugar can be especially challenging.
Jump to:
Making homemade granola is surprisingly simple! With basic pantry ingredients and a few minutes, you can customize a batch to fit your flavor preferences and dietary needs. The fun part is experimenting with different ingredients and combinations to discover your perfect blend.
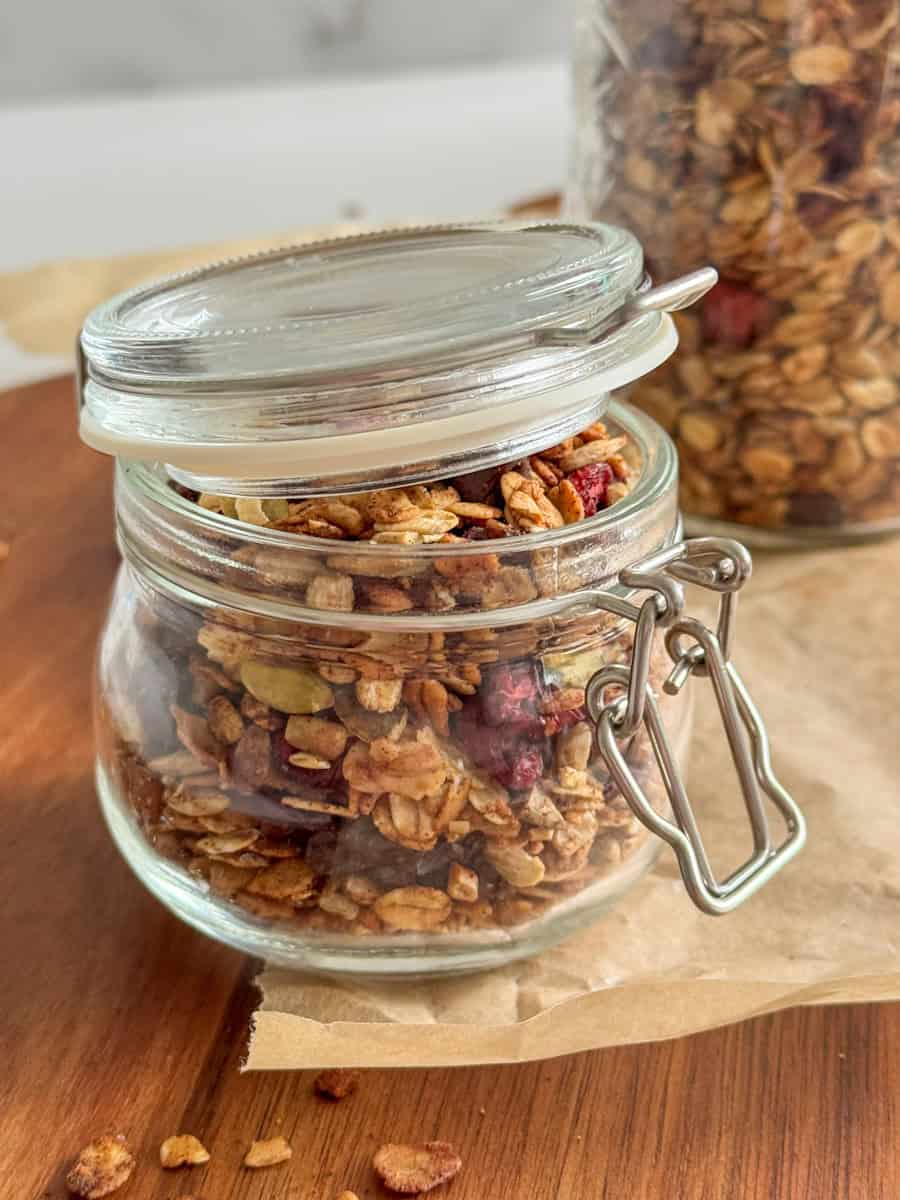
I now keep a jar of this granola recipe on hand for yogurt parfaits, smoothie bowls, or quick snacking. It also makes a thoughtful homemade gift for friends with allergies (or without!) during the holidays!
Looking for more allergy-friendly options? Check out my guides to peanut-free store-bought snacks and the best airplane snacks for peanut allergies!
Why you'll love this recipe:
- Healthier than store-bought varieties
- Naturally sweetened and refined sugar-free
- Budget-friendly
- Easy to customize to suit your preferences
- Stores well
Best Oats for Homemade Granola
Rolled or Old-Fashioned Oats are essential for this recipe; do not substitute quick, instant, or steel-cut oats, as they won't provide the crisp texture we want.
While oatmeal is naturally gluten-free, many commercial varieties are often contaminated or processed in facilities that also handle gluten and other allergens. If you have Celiac Disease, wheat allergy, or need to keep this recipe strictly gluten-free, always use certified gluten-free oats.
Recommended brands:
- Bob's Red Mill old-fashioned rolled oats (standard option)
- Bob's Red Mill gluten-free rolled oats (certified gluten-free)
- One Degree sprouted rolled oats (made in a peanut-free facility and are gluten-free)
Note: As with all packaged foods, always check the label for allergens, as ingredients and manufacturing processes are subject to change.
Ingredients
This nut-free granola recipe starts with a simple base of five core ingredients. Once you have this foundation, you can customize it with various mix-ins to create your perfect blend. The Base ingredients are:
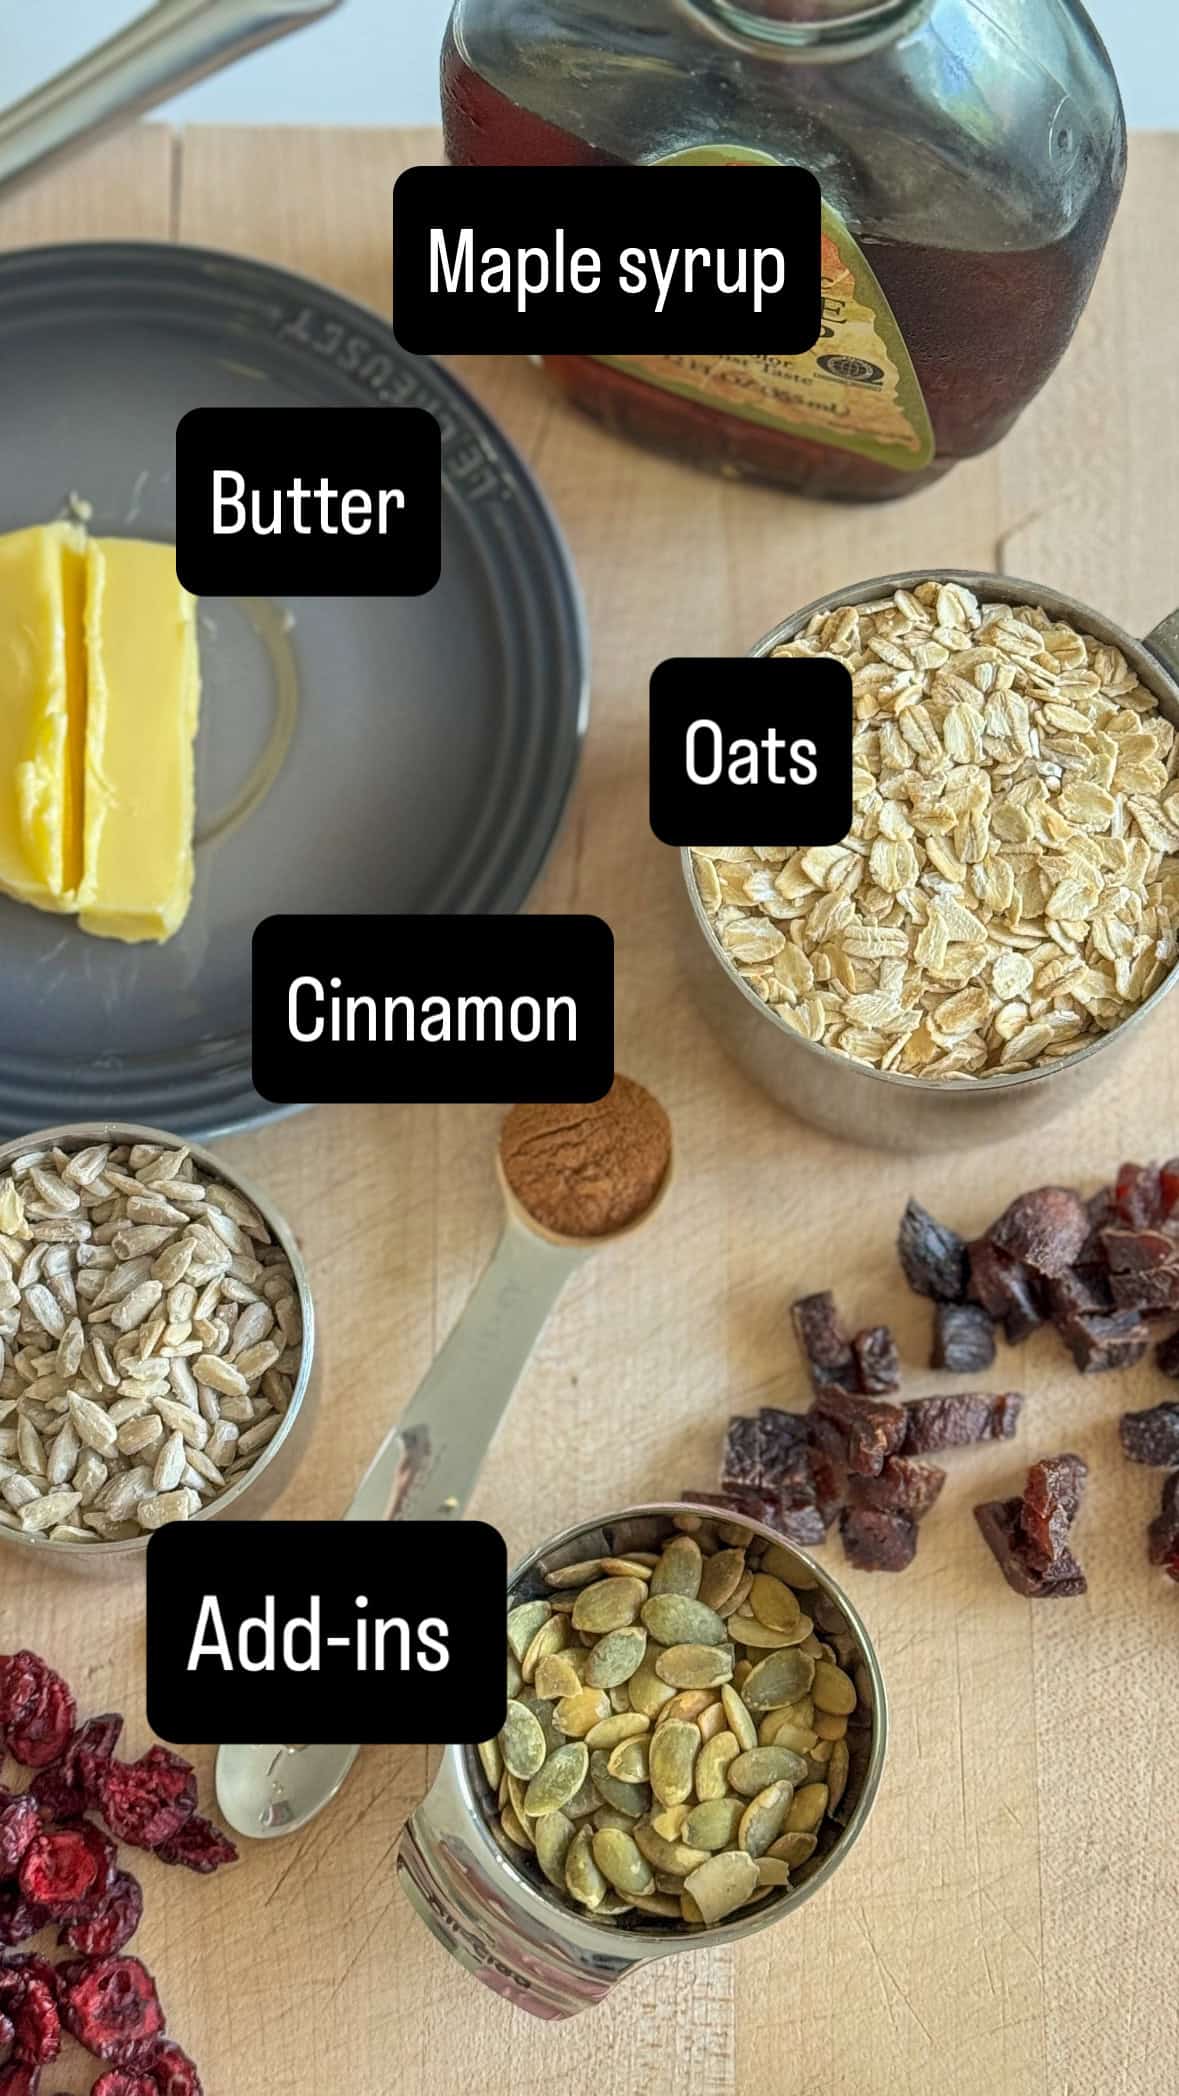
- Rolled or Old-Fashioned Oats - The foundation of our nut-free granola. Choose gluten-free if needed.
- Maple Syrup - Acts as a natural sweetener, creating delicious crunchy granola clusters we all love. You can substitute honey if preferred.
- Butter - Adds rich flavor and creates a crispy, golden exterior. For a dairy-free granola version, use refined or unrefined coconut oil, or olive oil for a more savory taste. Also, skip the salt if using salted butter.
- Cinnamon - Adds warmth and enhances the natural sweetness of the maple syrup.
- Sea Salt - Just a pinch
Optional Mix-Ins
Once you have the base for the nut-free granola recipe, you can customize it with various mix-ins or toppings to create different flavor combinations and textures. Here are some delicious nut-free granola add-in options:
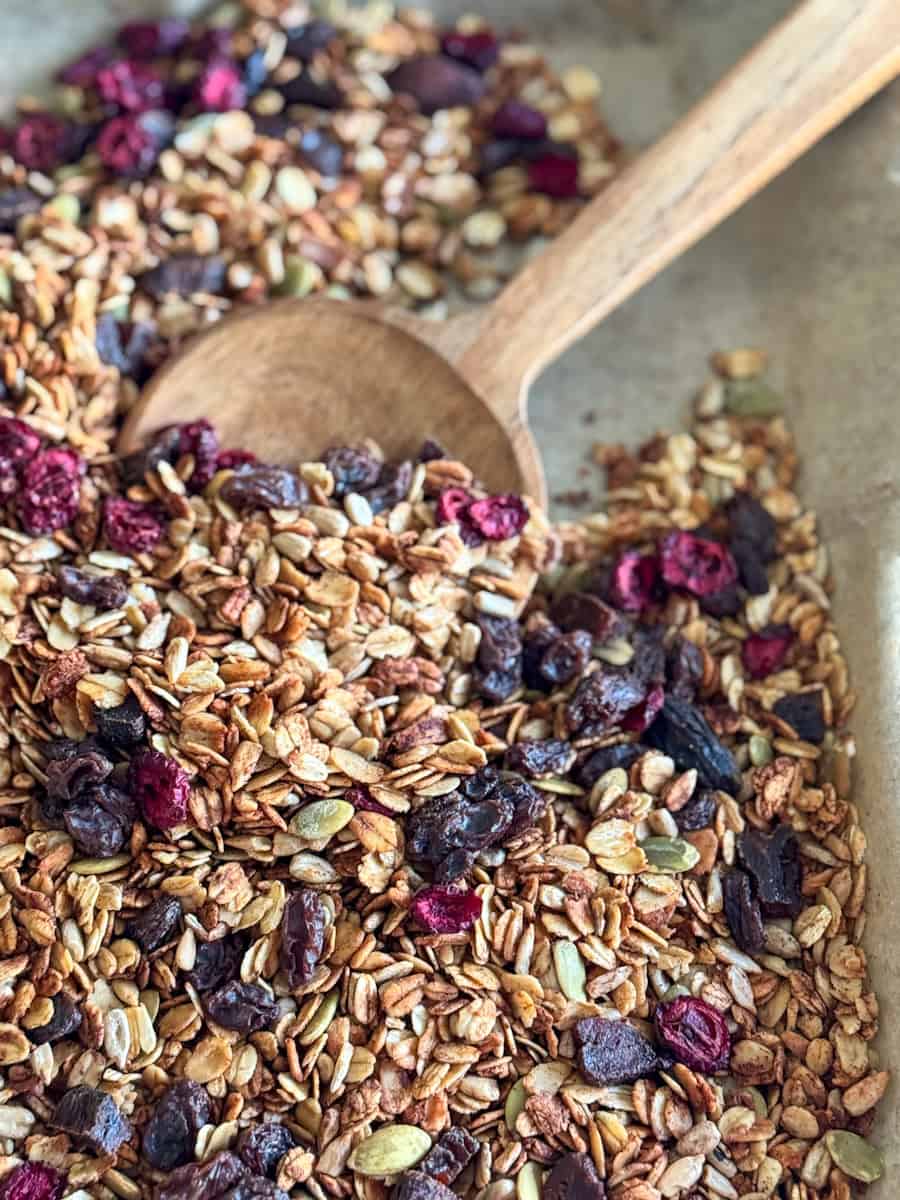
- Dried Fruit - Raisins, cranberries, goji berries, dried cherries, figs, dates, dried apricots
- Freeze-Dried Fruit - Blueberries, raspberries, strawberries, bananas
- Seeds - Pumpkin seeds/pepitas, sunflower seeds, flax seeds, chia seeds
- Additional Mix-Ins - Chocolate chips, citrus zest, coconut flakes
Note: If you don't need this recipe to be nut-free, feel free to incorporate nuts such as almonds, hazelnuts, or pistachios. For best results, add raw (not pre-toasted) nuts with the oats before baking to develop a rich, toasted flavor.
How to Make Nut-Free Granola
Granola is a forgiving recipe that allows for plenty of customization. Once you understand the basic technique, you can easily adjust the ratios to match your preferences - a little more maple syrup for sweeter clusters, extra cinnamon for more warmth, or a handful of additional seeds for texture. The beauty of homemade granola is that slight variations won't ruin the result. What's also important to keep in mind is which ingredients can be toasted in the oven and which should be added afterward, once the granola has cooled, to preserve their texture and flavor.
- Preheat the oven to 325°F.
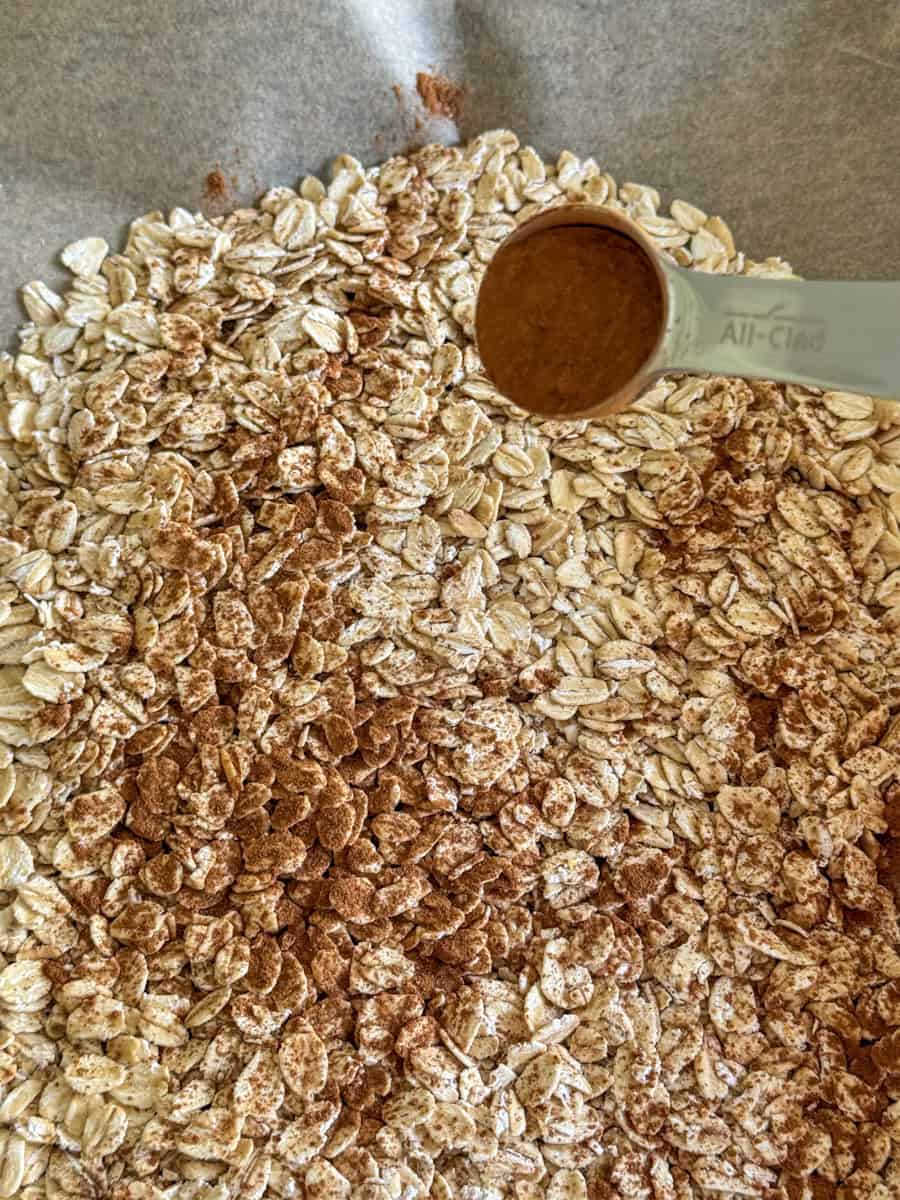
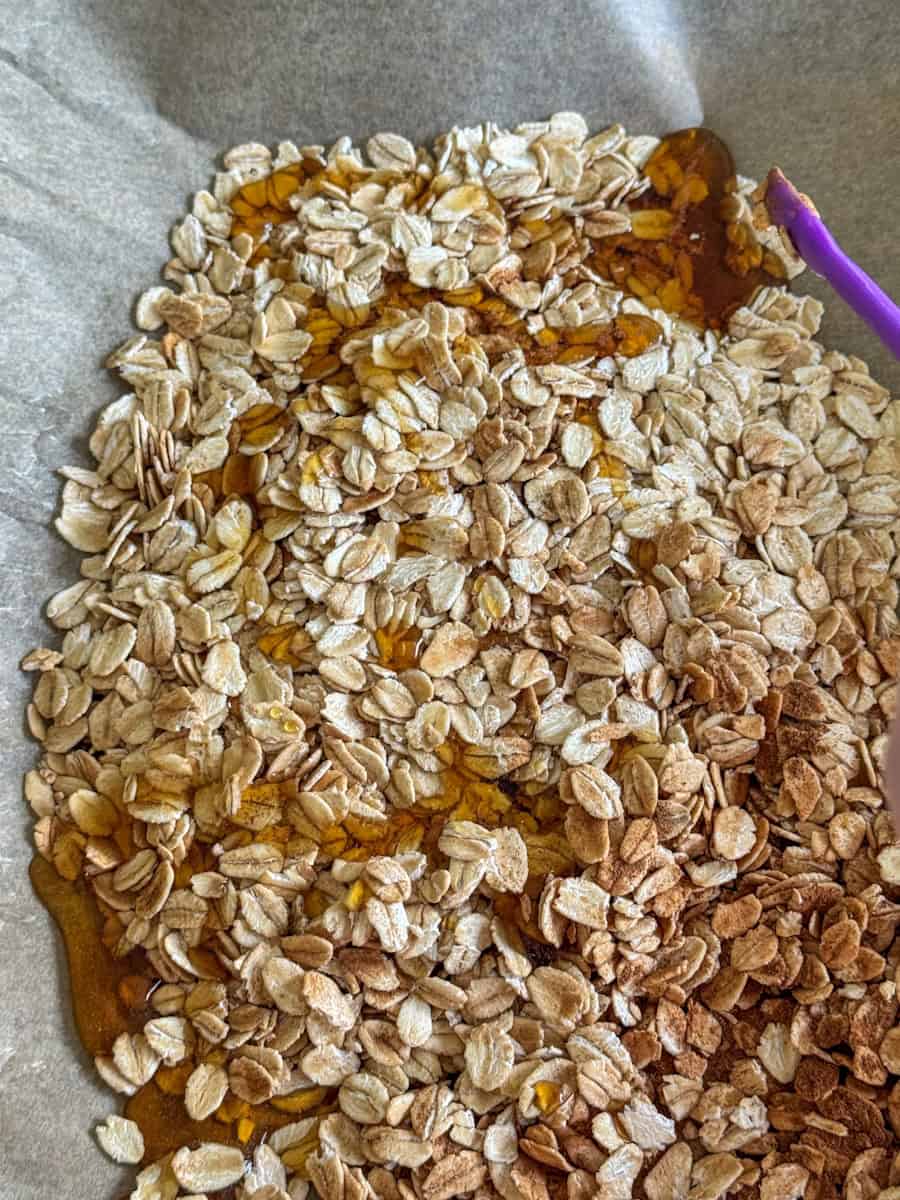
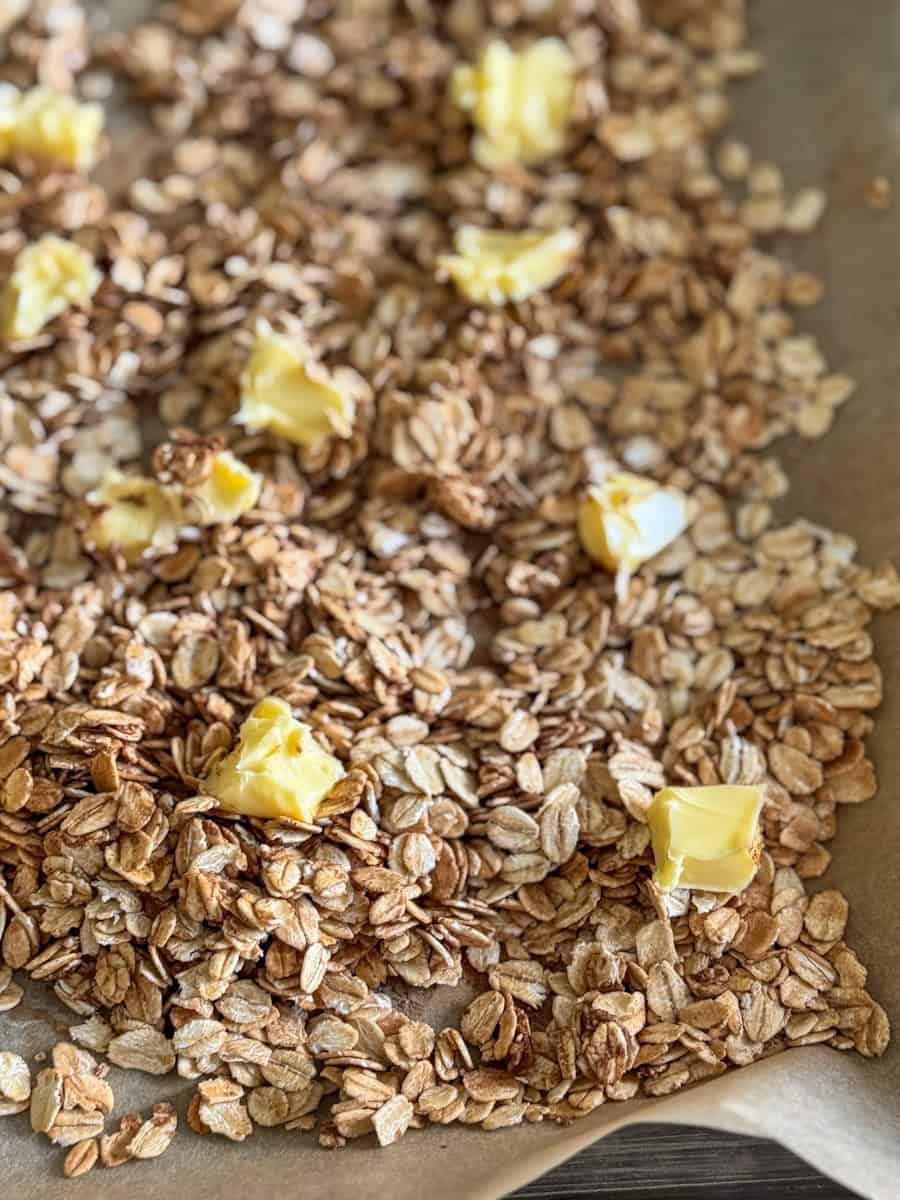
- Spread the oats on a parchment-lined baking sheet, sprinkle with cinnamon and salt (skip the salt if using salted butter), drizzle with maple syrup, and place small chunks of room temperature butter all over. Alternatively, you can melt the butter and pour it over the oats. If using raw seeds or nuts, add them at this stage as well.
- Bake on the middle rack for about 25 minutes, keeping a close eye so it doesn't burn. Mix with a spatula halfway through baking for even browning.
- Remove from the oven and let it cool completely.
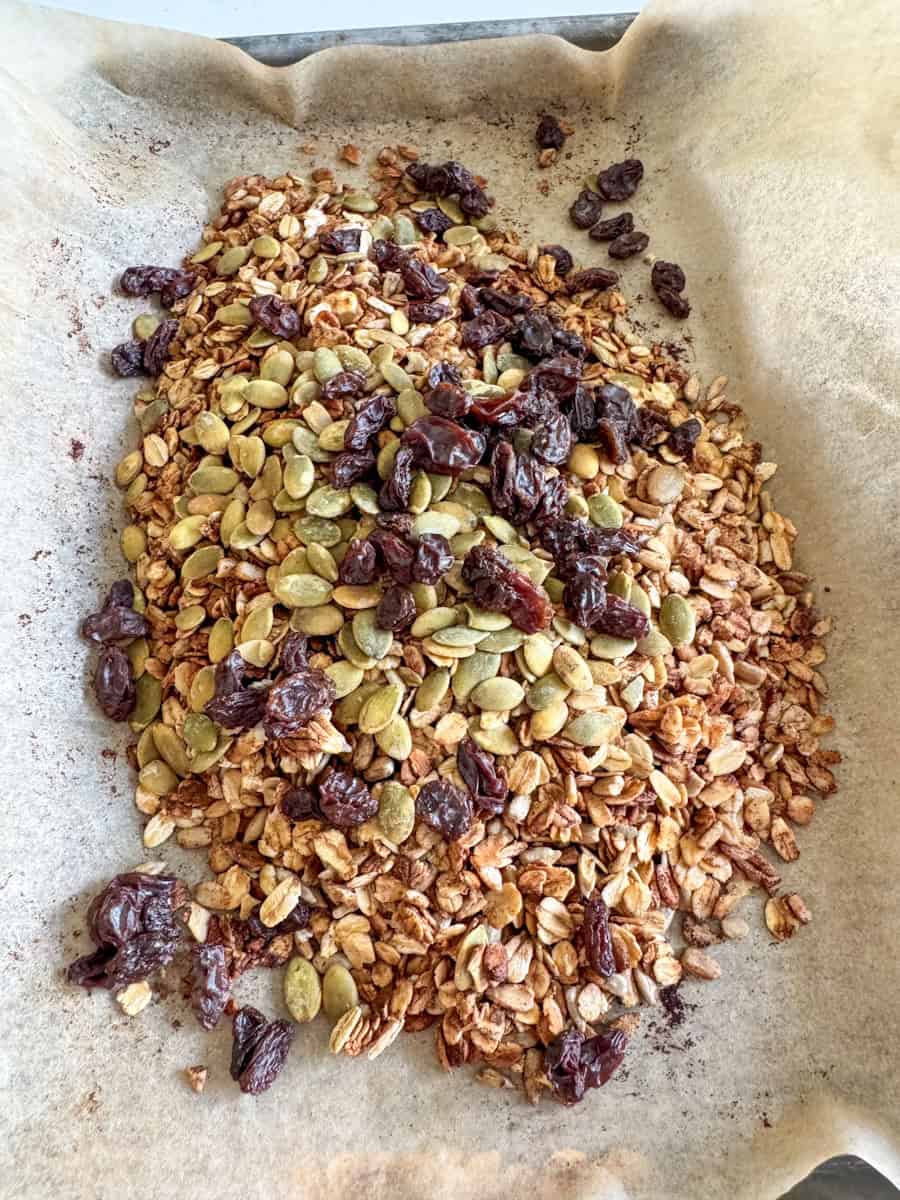
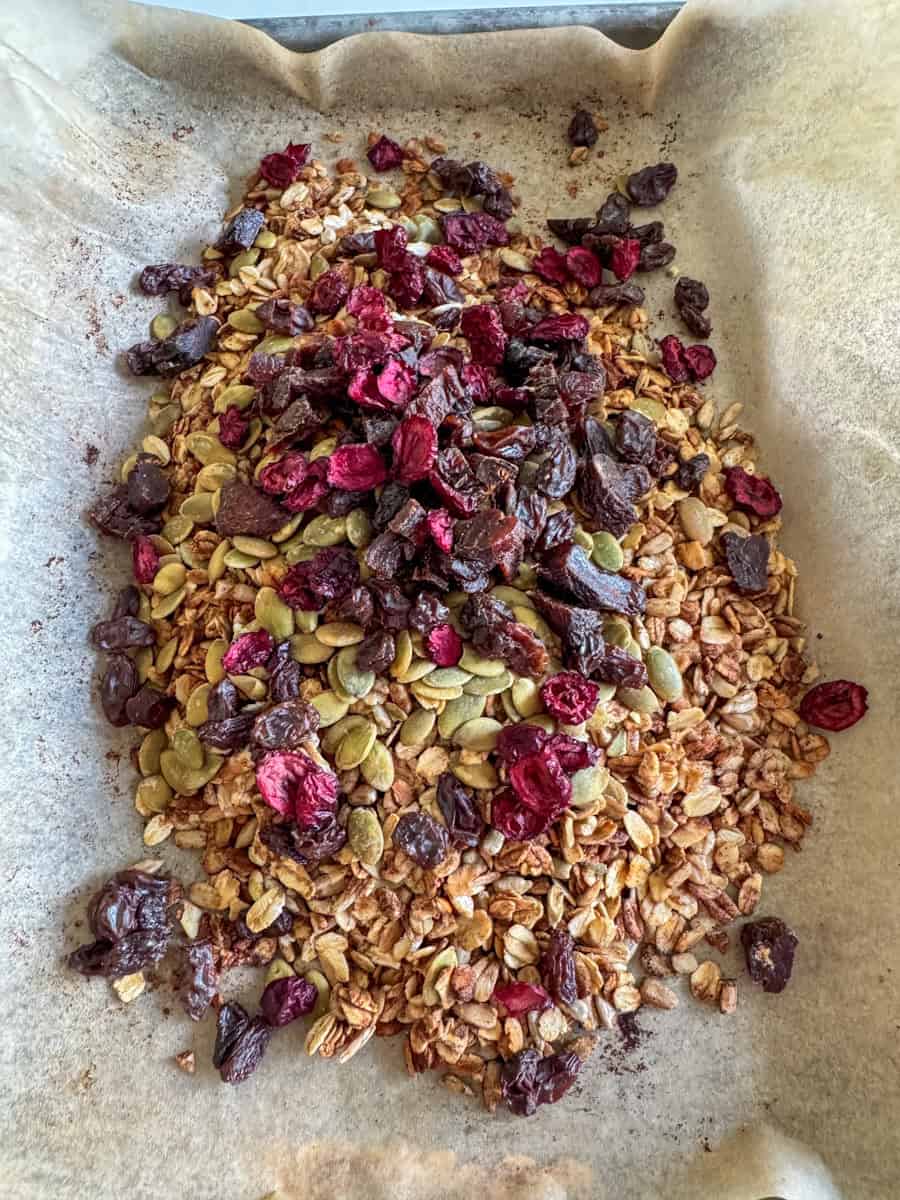
- Mix in any heat-sensitive ingredients, such as dried fruit or chocolate chips, once the mixture has cooled. Serve over yogurt or other favorites, or transfer to a jar or sealed container to keep fresh.
Recipe Tip
- Line the baking sheet with parchment paper to help the granola clump and stick to the paper, making it easy to remove the clusters.
- Watch closely in the final minutes of baking - granola can go from golden to burnt quickly!
- Allow the granola to cool completely on the baking sheet without stirring or removing it - this allows it to crisp up.
- Add mix-ins like dried fruit, chocolate chips, or any heat-sensitive ingredients only after the granola has completely cooled, to prevent burning or melting.
- Transfer the mixture to a storage container as soon as it cools. Otherwise, it will become too soft.
Storage Tips
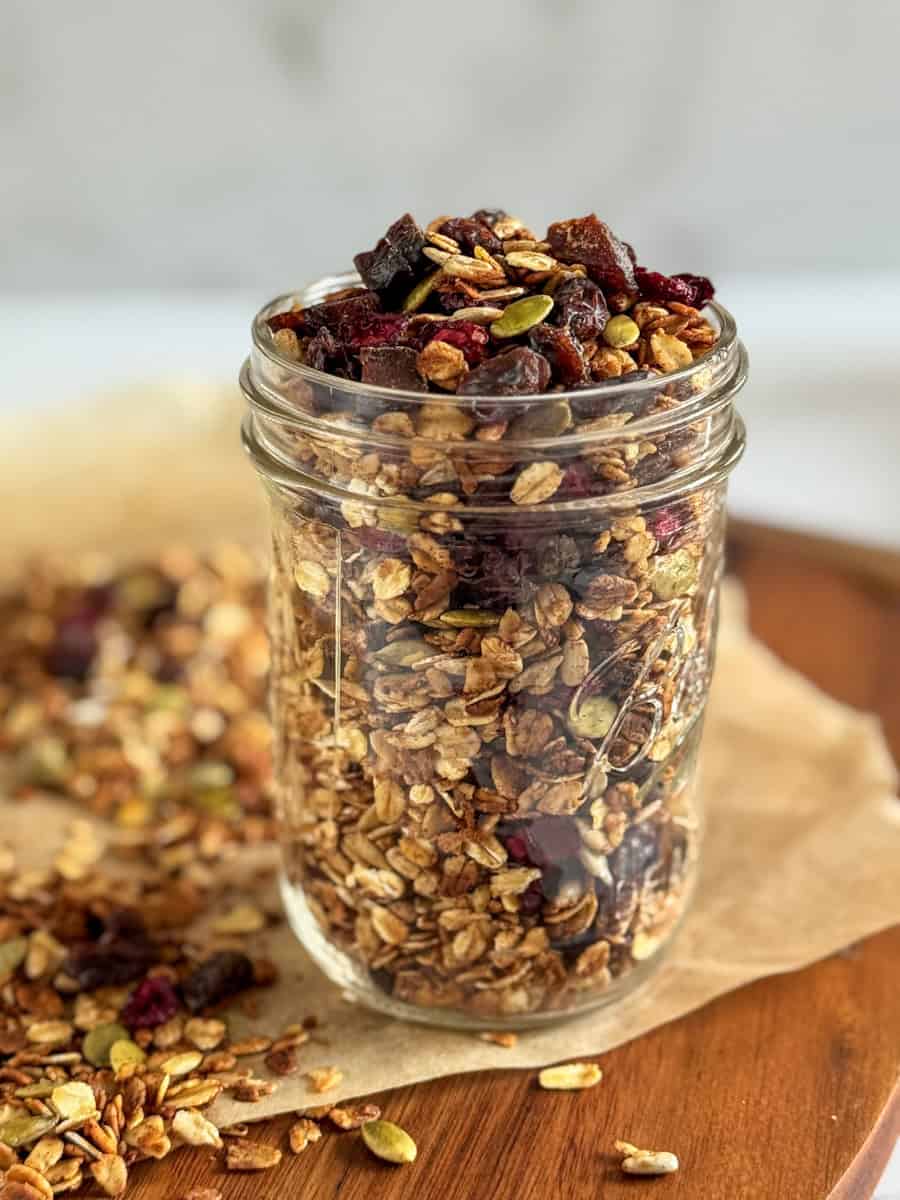
To store your granola, first, allow it to cool completely. Then, transfer it to a sealable glass jar, an airtight container, or a bag. Store at room temperature for up to 1-2 weeks.
Or, freeze your granola in a freezer-safe bag for up to 3 months. Thaw in the fridge or at room temperature when you're ready to eat. If the granola becomes a bit soft, place it back in the oven for just a few minutes to crisp back up. Just be careful not to let it burn!
What to Serve With
This nut-free granola is incredibly versatile and can be enjoyed in multiple ways:
- On its own - Enjoy a handful as a satisfying snack, like a trail mix.
- As a breakfast cereal - Pour your favorite dairy or dairy-free milk over a bowl of granola for a quick and hearty breakfast.
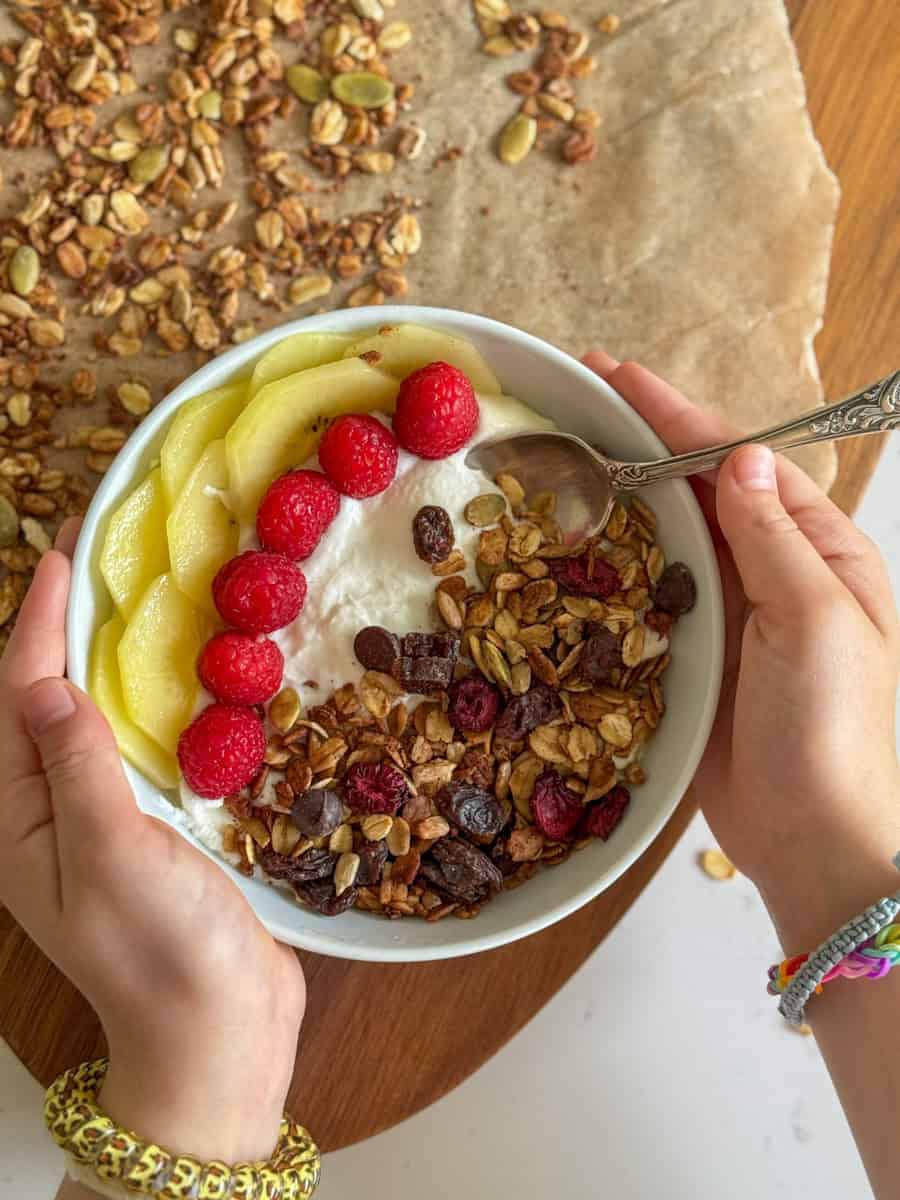
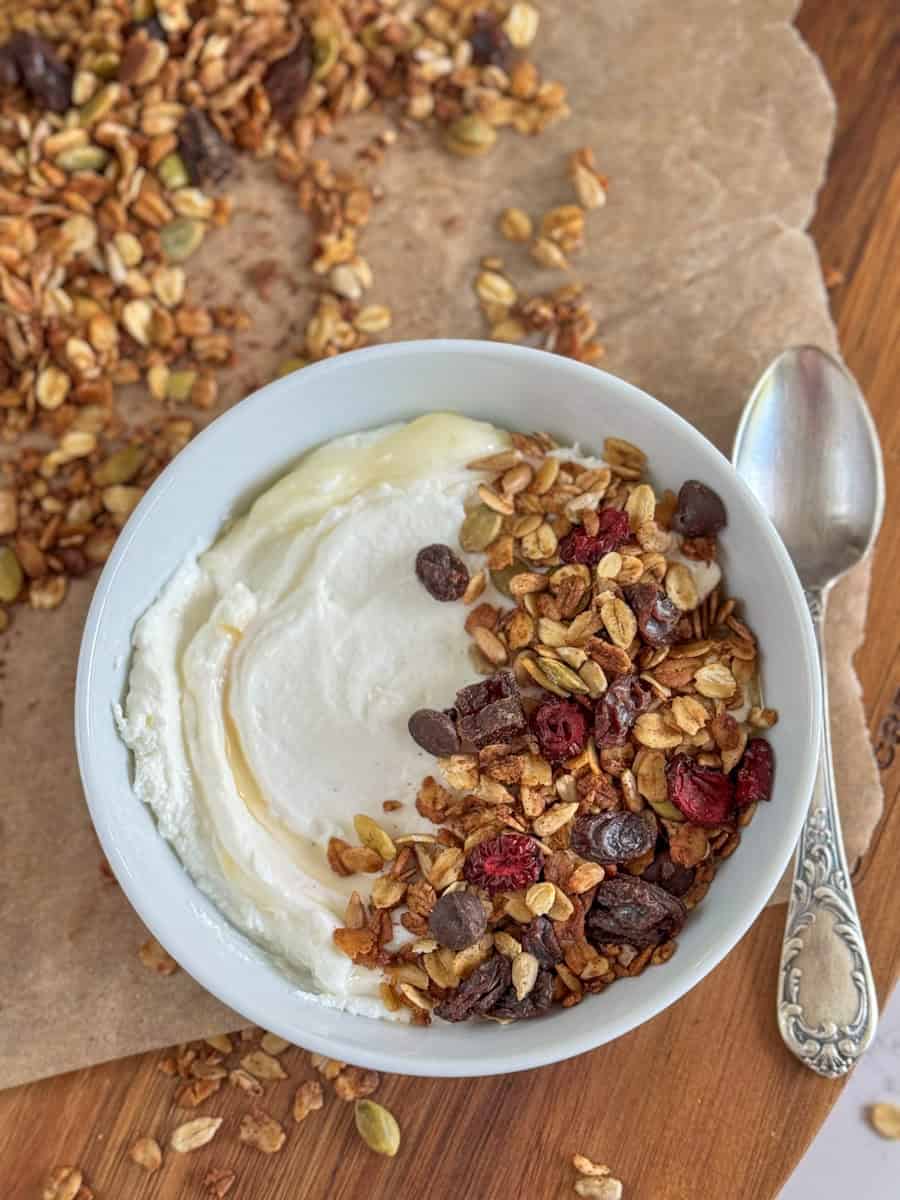
- Yogurt topping - Sprinkle over plain or flavored yogurt for added crunch and flavor. I love it over my favorite dairy-free yogurt.
- Smoothie bowls - Use as a topping for thick smoothie or acai bowls to add texture and crunch.
- Fruit companion - Serve with fresh fruit or applesauce for a balanced snack.
- Dessert upgrade - Sprinkle over ice cream or frozen yogurt for a sweet treat.
There is no right or wrong way to enjoy homemade granola - feel free to get creative!
Recipe FAQ
Be sure not to disturb your granola as it bakes. Then, allow it to cool completely, and store it immediately to prevent moisture in the air from turning it soggy.
Overcooking is the most common reason granola tastes bitter. To prevent this, keep a close eye on it and remove it from the oven as soon as it's lightly golden. Remember, it will continue to bake slightly as it cools!
Yes! While I prefer homemade granola, if you're short on time, you can find pre-made, allergy-friendly granola options like 88 Acres Seed Granola or Made Good Granola, both of which are made in nut-free facilities. If you're specifically managing a peanut allergy (but nuts are okay), One Degree Cacao Granola is a good option as it's made in a peanut-free facility.
Looking for more allergy-friendly options? Check out my guides to peanut-free store-bought snacks and the best airplane snacks for peanut allergies!

Allergy-Friendly Recipes
Looking for other allergy-friendly recipes like this? Try these:

Gluten-Free Recipes
An assortment of gluten-free recipes:


How to make Granola
Ingredients
Granola Base
- 1½ cups rolled or old fashioned oats
- 1½ teaspoon cinnamon
- ¼ sea salt
- 2 tablespoon maple syrup
- 2 tablespoon unsalted butter, room temperature
Granola Add-ins
- ½ cup sunflower seeds
- ¼ cup raisins
- ¼ cup dried cranberries
- ⅓ cup pumpkin seeds
- ¼ cup dried apricots, chopped
- ⅓ cup chocolate chips
Instructions
- Preheat oven to 325℉.
- Spread oats on a parchment-lined baking sheet. Sprinkle with cinnamon and salt (skip salt if using salted butter), drizzle with maple syrup, and place small pieces of butter throughout the oats. (Alternatively, you can melt the butter and pour it over the oats.) If using any raw seeds or nuts, add them at this stage.
- Bake for about 25 minutes on the middle rack, stirring halfway through. Watch closely to prevent burning.
- Cool completely without disturbing.
- Add dried fruit, chocolate chips, and any other heat-sensitive add-ins once completely cooled. Store in airtight container.
Notes
- This granola is lightly sweetened; add an extra tablespoon of maple syrup if you prefer a sweeter taste.
- For add-ins, use ¼ to ½ cup of each add-in, such as dried fruit, seeds, dried coconut, or chocolate chips.
- Watch closely during the final minutes of baking, as it can quickly go from golden to burnt.
Leave a Reply